THE Q & A SERIES
Rotating a dart on a bodice
Hi Emily,
I recently made a top with a side bust dart and I'm wondering how tricky it is to move this dart to the armhole? Will the fit still be the same? I like the look of armscye darts, but they don't seem to be as common in patterns as regular side seam bust darts.
Thanks,
Catherine
Hi Catherine,
Darts are on our minds at the moment after the release of our new pattern, the Neale jumpsuit. To answer your question, we thought we'd share with you one of the (many) tutorials from the Neale jumpsuit Fit Kit.
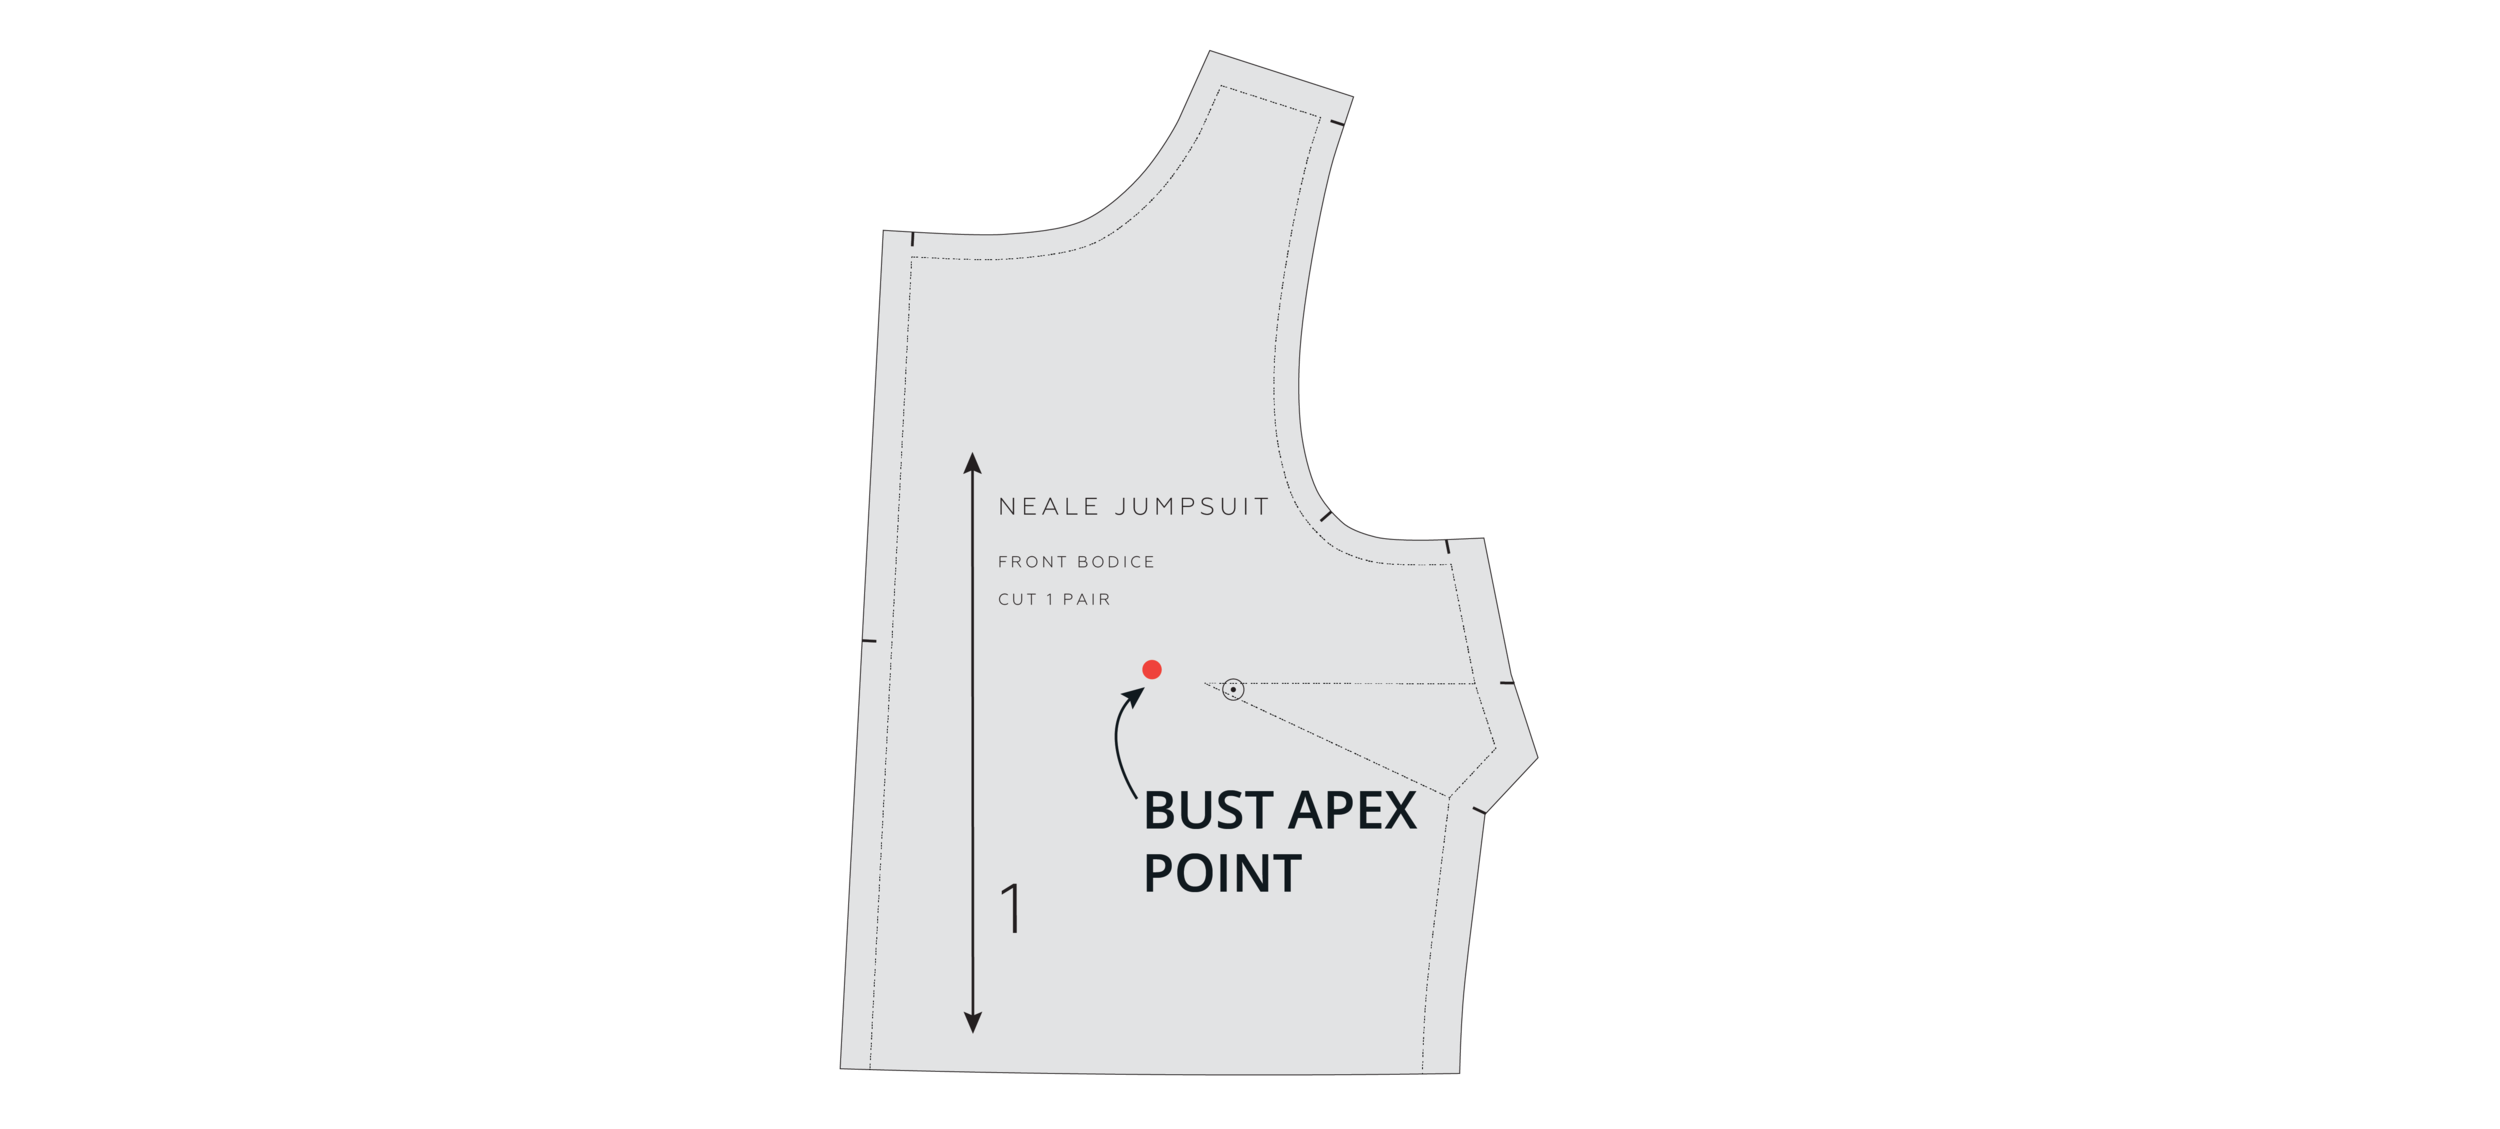
Bust darts can be moved around a pattern. You might choose to do this to change the look of a garment, due to your personal preference or to split a dart value. As long as the BUST APEX POINT remains in the correct position, the fit will remain the same - only the design will change due to the moving dart line.
In the illustration, you can see a number of places where you could move the side dart on the jumpsuit to. You can use this technique on any pattern. The dart position options may vary depending on the design. For example, if you have a waist seam, you can move the dart to the waist seam.
STEP 1
Mark the BUST APEX POINT onto the FRONT BODICE [1]. If you have already found your specific BUST APEX POINT, mark it on the pattern.
STEP 2
Re-draw the dart, using the BUST APEX POINT as the new dart tip.
Measure and record the distance between the original dart tip and the BUST APEX POINT. You will use this later on when you mark in the new dart.
STEP 3
Draw a line to indicate where you would like your new dart to be positioned. Use the diagram at the beginning of the tutorial as a guide. The line needs to meet the BUST APEX POINT.
STEP 4
Cut along the lower dart arm from the side seam towards the BUST APEX POINT. Do not cut all the way to the dart point - leave a small 1-2mm 'hinge' to keep the two pieces together.
Cut along your new dart position line towards the BUST APEX POINT. Again, stop cutting 1-2mm from the point.
STEP 5
Close out the original dart by moving the upper dart arm down to meet the lower dart arm. You will see that by closing the side seam dart you have opened a new dart in the new position. If you only want to move part of the dart, you can do so. Use tape to close the original dart permanently.
As you can see in the example, the new dart is smaller than the original dart. This is because the seam that we moved the dart to (armhole) is closer to the BUST APEX POINT than the seam it was originally on (side seam). You can think of darts as rotating around a circle (the centre of the circle being the BUST APEX POINT). The further the seam is from the BUST APEX POINT, the larger the dart width at the seam will be.
STEP 6
Take a piece of paper and glue / tape underneath the dart opening. Draw a line from the top of one dart arm to the other on the CUT LINE. Mark the centre of this line. Draw a straight line from the centre point through to the BUST APEX POINT.
Mark the new dart point by looking at the distance recorded in STEP 2.
Mark this amount back from the BUST APEX POINT within your new dart.
Add dart shaping - you can use this tutorial as a guide. Mark drill hole 1.2cm (½in) back from the new dart tip.
I hope this helped you and you're excited to alter some patterns to better fit your preferences. If you would like to learn more techniques like this, you might be interested in our Neale jumpsuit pattern and Fit Kit.
Happy sewing,
Emily
For more issues of the Q & A series, you can check out the archive here.
What you’ve been making
Neale jumpsuit made by @the.hemline.eclectic
Peppermint wrap top made by @loulaandstitch
Acton dress made by @jesssewhappy
Rushcutter dress made by @_izzyhiggs


